Installing Sidra
Information
Ensure you have a Sidra license before starting the process. For assistance or to obtain a license, please contact us at [email protected].
This document provides information for deploying Sidra in your Azure subscription by deploying first Sidra's Supervisor, which will bootstrap the rest of the services in turn.
Prerequisites
The requirements for a proper deployment process are:
- Access to an existing Azure Portal account is required before starting the deployment.
-
Download Supervisor's deployment files. PowerShell scripts (must all be contained in the same folder) for executing the pre-deployment script:
-
An Azure Portal user with these permissions:
-
Azure RBAC Built-In Roles scoped to the Subscription:
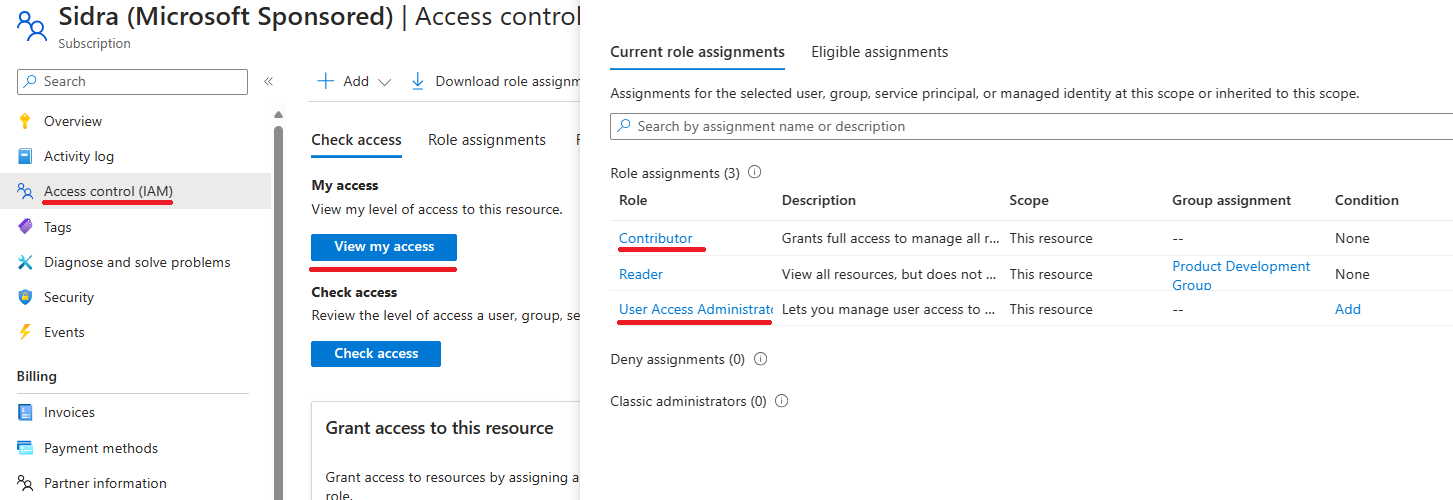
- Contributor:
- Allows to create and manage all types of Azure resources (keyVaults, container Apps, Storage accounts...).
- Assigning Contributor role to the managed identity of Supervisor is mandatory to allow deploying Sidra Service from Supervisor.
- Role Based Access Control Administrator (Preview) or User Access Administrator:
- This role is needed to execute a PowerShell script from ARM template. This script resets the password of Active Directory App Registration created during the Pre-deploy script execution.
Info
Role Based Access Control Administrator (Preview) has fewer allowed actions and is recommended. However, in case of the preview doesn't allow this Role to be eligible to the customer, there's also the option of using the User Access Administrator role.
These user access to subscription levels can be checked on Access control section on Azure portal.
- Contributor:
-
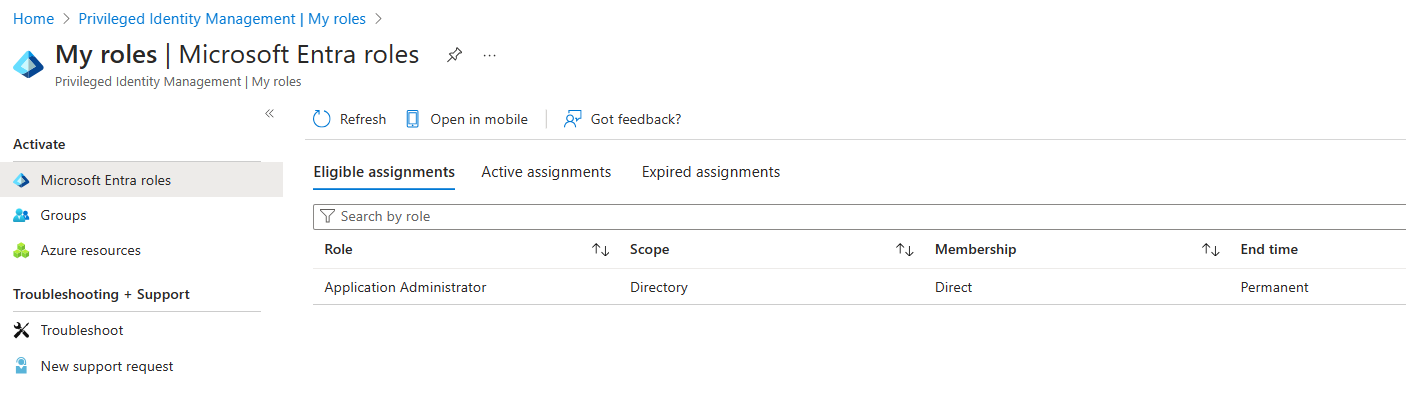
Microsoft Entra ID (MEID) Roles (previously Azure Active Directory Roles):
-
Application Administrator. Allows to create and manage applications in Azure AD, including registering new applications and managing existing applications. It is used to create
<<CompanyName>>.Supervisor.<<Environment>>.Managerand<<CompanyName>>.Supervisor.<<Environment>>.IdentityServerAdAccess. -
Privileged Role Administrator. Allows to assign roles to other users, groups, or applications in the subscription, including privileged roles. We need Privileged Role Administrator to assign Contributor role to Supervisor Managed Identity in order to allow a new resource group creation.
These user roles can be checked on Privileged Identity Management section on Azure portal.
-
-
-
PowerShell minimum required version: 7.3.6.
- Set the PowerShell execution policies for Windows computers, by setting the
CurrentUserscope toUnrestrictedexecution policy to allow executing thePre-deploy.ps1script. Use this command: - Install Azure CLI for Windows (minimum required version 2.53.0).
-
Certain Azure Resources Providers need to be registered prior to this deployment. These resources are the following:
- Microsoft.ADHybridHealthService
- Microsoft.Advisor
- Microsoft.AlertsManagement
- Microsoft.Authorization
- Microsoft.App
- Microsoft.CognitiveServices
- Microsoft.Compute
- Microsoft.ContainerInstance
- Microsoft.ContainerRegistry
- Microsoft.ContainerService
- Microsoft.CostManagement
- Microsoft.Databricks
- Microsoft.DataFactory
- Microsoft.EventGrid
- Microsoft.Features
- Microsoft.Insights
- Microsoft.KeyVault
- Microsoft.ManagedIdentity
- Microsoft.MarketplaceOrdering
- Microsoft.Network
- Microsoft.OperationalInsights
- Microsoft.Portal
- Microsoft.ResourceGraph
- Microsoft.Resources
- Microsoft.Search
- Microsoft.SerialConsole
- Microsoft.SignalRService
- Microsoft.Sql
- Microsoft.Storage
- Microsoft.Support
Check for more information in Microsoft Azure Resources Providers site.
1. Supervisor's deployment
The deployment consists of two main steps:
- Deployment of Azure Active Directory (AAD) App registrations by executing the PowerShell script: Pre-deploy.ps1.
- Deployment of Sidra's Supervisor ARM template by using "Deploy a custom template" feature in Azure Portal.
Step 1. Pre-deployment script
A PowerShell script must be run before the Supervisor is deployed. This script will create some necessary resources to start Sidra's installation like:
-
Managed Identities(stored within the Azure Resource Group):
- Identity with "Directory-readers" privileges
- Identity with "Application-administrator" privileges
-
With the
appRegistrationNameassigned on thePre-deploy.ps1(recommendable name:<<CompanyName>>.Supervisor.<<Environment>>), the script will create two Azure Active Directory (AAD) App registrations:<<CompanyName>>.Supervisor.<<Environment>>.Manager. This app registration is used to log in to Azure when the DSU is deployed. These values secrets are stored in Supervisor keyVault:AADApplications--Manager--PasswordAADApplications--Manager--ApplicationId
<<CompanyName>>.Supervisor.<<Environment>>.IdentityServerAdAccess. This app registration is used by Authentication Service. When this app registration is created, the values secrets are also included in the Supervisor keyVault for authentication proposals. These secrets are:AADApplications--IdentityServer--ApplicationIdAADApplications--IdentityServer--PasswordAAD--0--ClientSecret
-
Azure Resource Group
Script parameters
For the PowerShell script to execute successfully, these are the necessary parameters:
| Parameter name | Description | Example |
|---|---|---|
appRegistrationName | Name used in the creation of the ADD app registrations | Sidra.Supervisor.Dev |
subscriptionId | The subscription's ID in which the resources are going to be deployed | 000000-0000-0000-0000-000000000000 |
tenantId | The directory ID of the used subscription | 000000-0000-0000-0000-000000000000 |
resourceGroupName | Name of the resource group which will have the created managed identities. This name is going to be used later for Sidra's resource group name | Sidra.Supervisor.Dev |
resourceGroupLocation | Location where the resource group is created | northeurope |
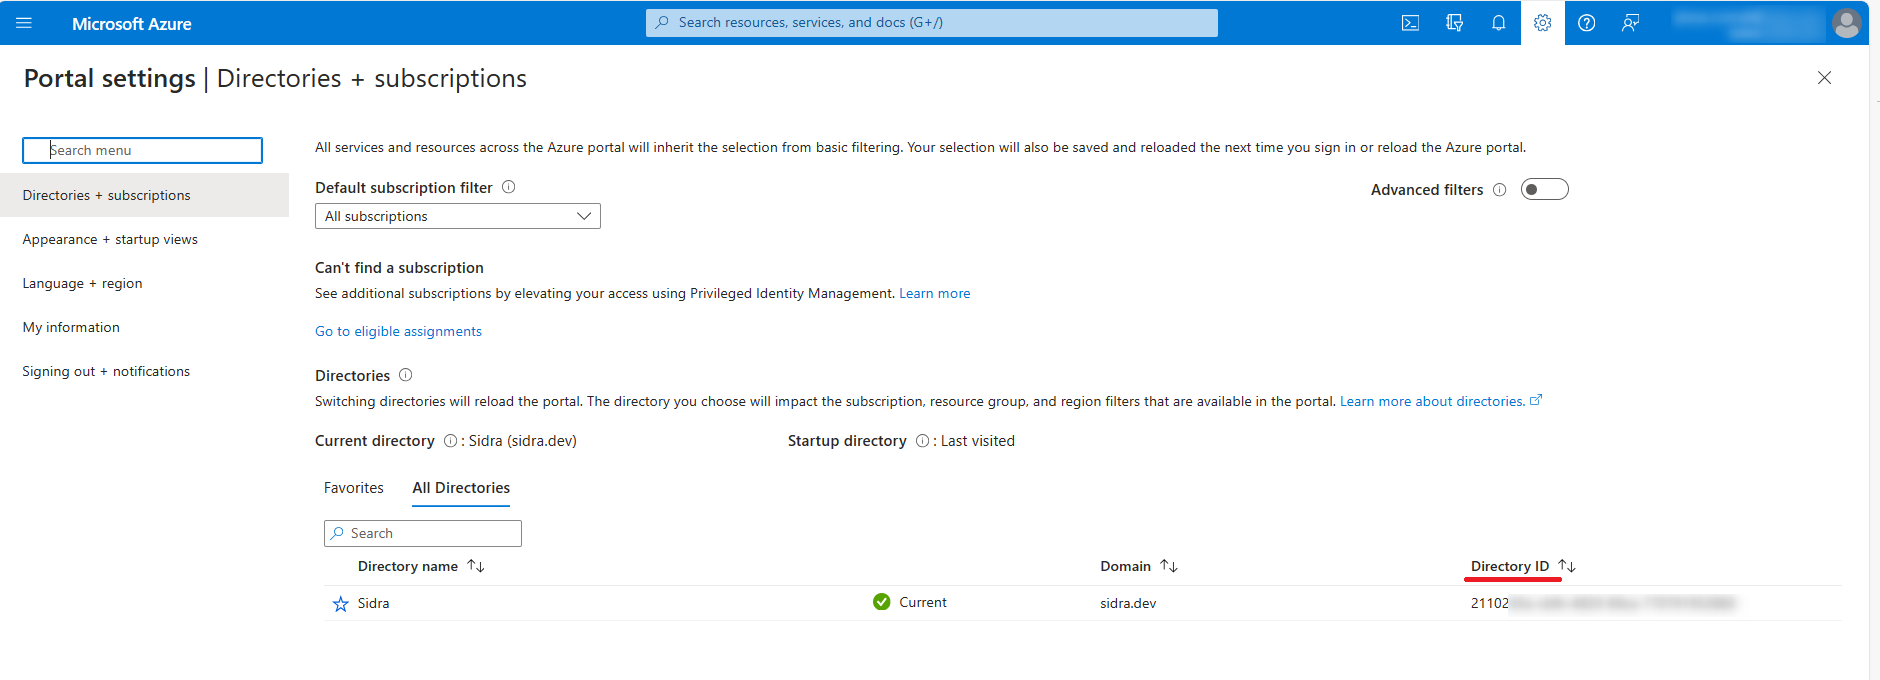
Subscriptions and directories info in Azure Portal
These parameters can be retrieved from Azure Portal: 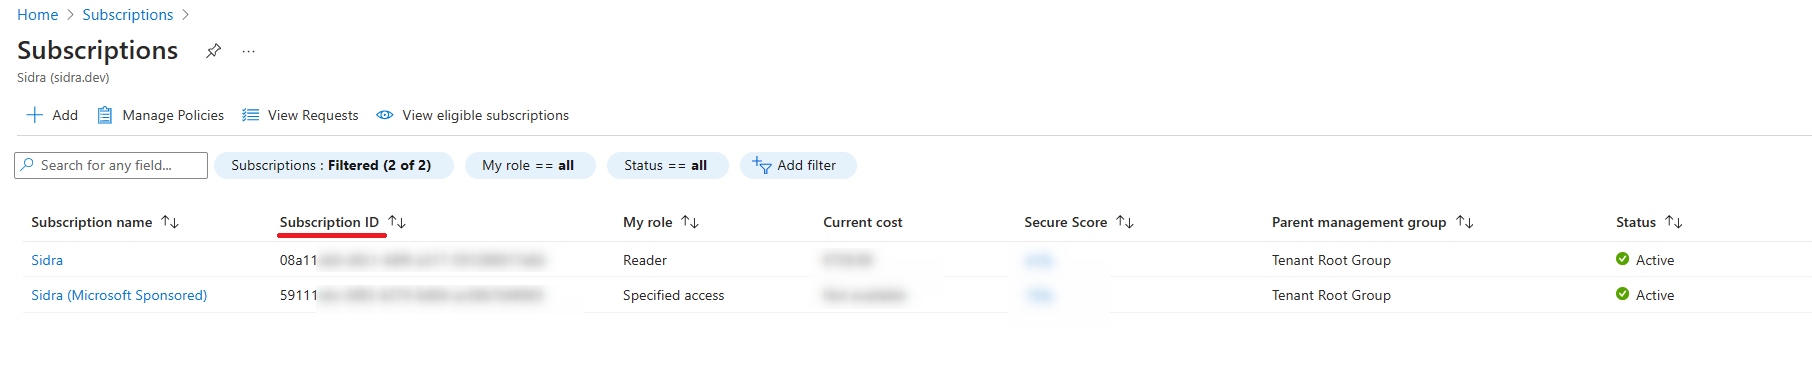
Execute Command
The steps for deploying the script are:
- Open a PowerShell 7 cmd.
- In the cmd, go to the location where the
Pre-deploy.ps1script is. -
Execute this command in the cmd:
Remember to replace the parameter placeholders for the correct value that you prepared in the previous step.
.\Pre-deploy.ps1 -appRegistrationName [appRegistrationName] -tenantId [tenantId] -subscriptionId [subscriptionId] -resourceGroupName [resourceGroupName] -resourceGroupLocation [resourceGroupLocation]Example:
.\Pre-deploy.ps1 -appRegistrationName "Sidra.Supervisor.Dev" -tenantId "000000-0000-0000-0000-000000000000" -subscriptionId "000000-0000-0000-0000-000000000000" -resourceGroupName "Sidra.Supervisor.Dev" -resourceGroupLocation "northeurope"- During the execution, a webpage from Azure is going to pop up in your default web browser asking you to log in. Log in with a user that satisfies the prerequisites mentioned before.
-
Now, the command will output some values. This is an example:
AAD applications
----------------------------------------------------------------
App Registration Identity Server Id: 00000000-0000-0000-0000-000000000000
App Registration Manager Id: 00000000-0000-0000-0000-000000000000
App Registration Manager Object Id: 00000000-0000-0000-0000-000000000000
----------------------------------------------------------------
From this script output, take note of those parameters values: App Registration Identity Server Id and App Registration Manager Id.
Step 2. Enable Unity Catalog
Starting on version 2024.06, Sidra now supports Databricks Unity Catalog as metastore backend.
More info about Unity Catalog in Databricks Documentation.
Data on old Sidra deployments need to be moved to Unity Catalog to keep it available in Sidra 2024.06. Click here to see how to do it.
Unfortunately, this step cannot be automated yet and has to be done manually between the pre-deployment script execution and the actual Sidra deployment.
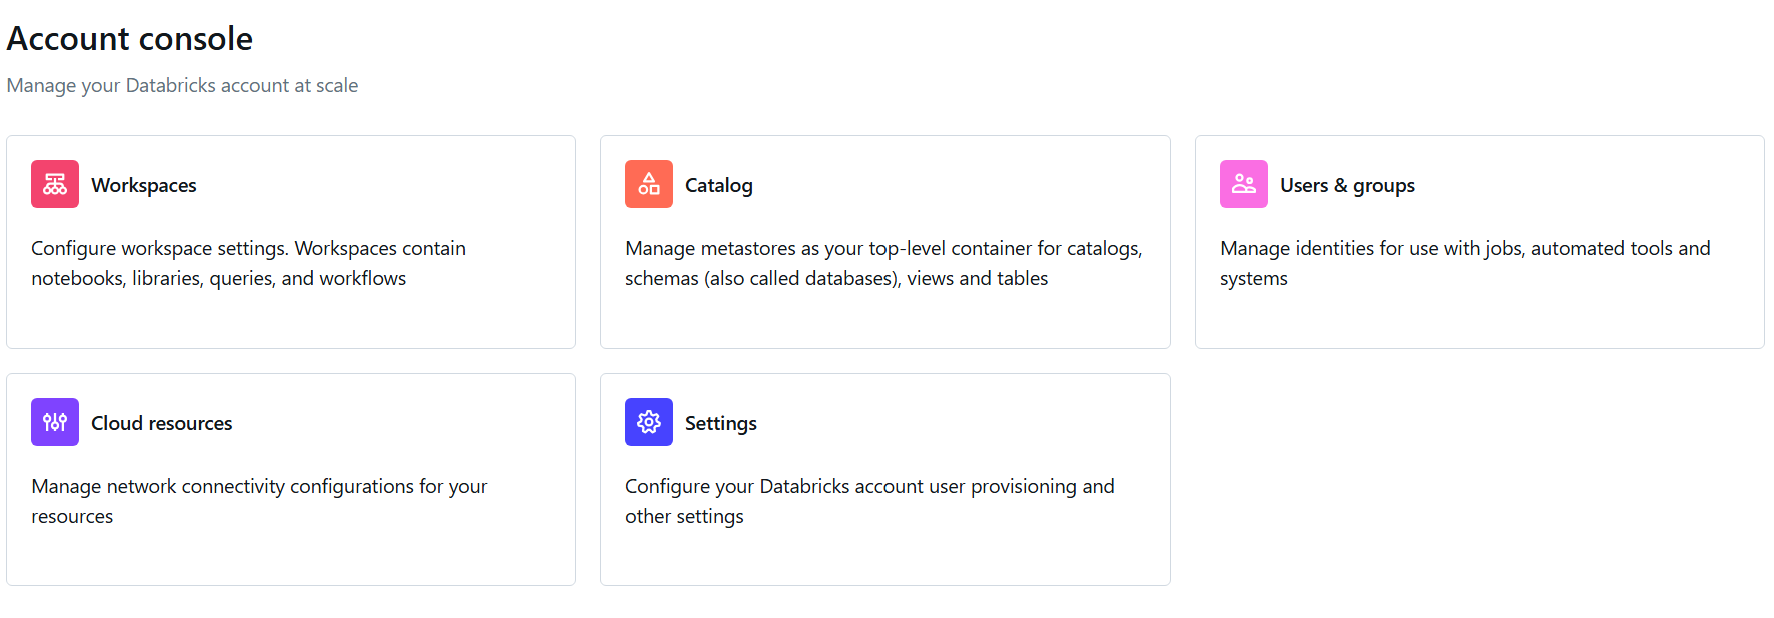
You need to go to Databricks Account Console using a Databricks Account Administrator.
- If you don´t have one, for example, if this is the first time you use Databricks, you need to use the Entra Id Global Administrator. With it, you can grant Account Administrator to other users.
- If you cannot access to the Account Console maybe is because you have never deployed a Databricks Workspace in your Azure Tenant. You can deploy one using the Portal and remove it afterwards, the console will be available since then.
Once you have access to the console, there are three things to do:
-
Take note of the Databricks Account Id. You can find it in the upper right menu as in the figure below.

-
Grant Account Admin permissions to the Sidra Manager Service Principal you have got from the pre-deployment script, it is the App Registration Manager Id value. To do so, go to Users and Groups...
Look for the Sidra Manager Service Principal
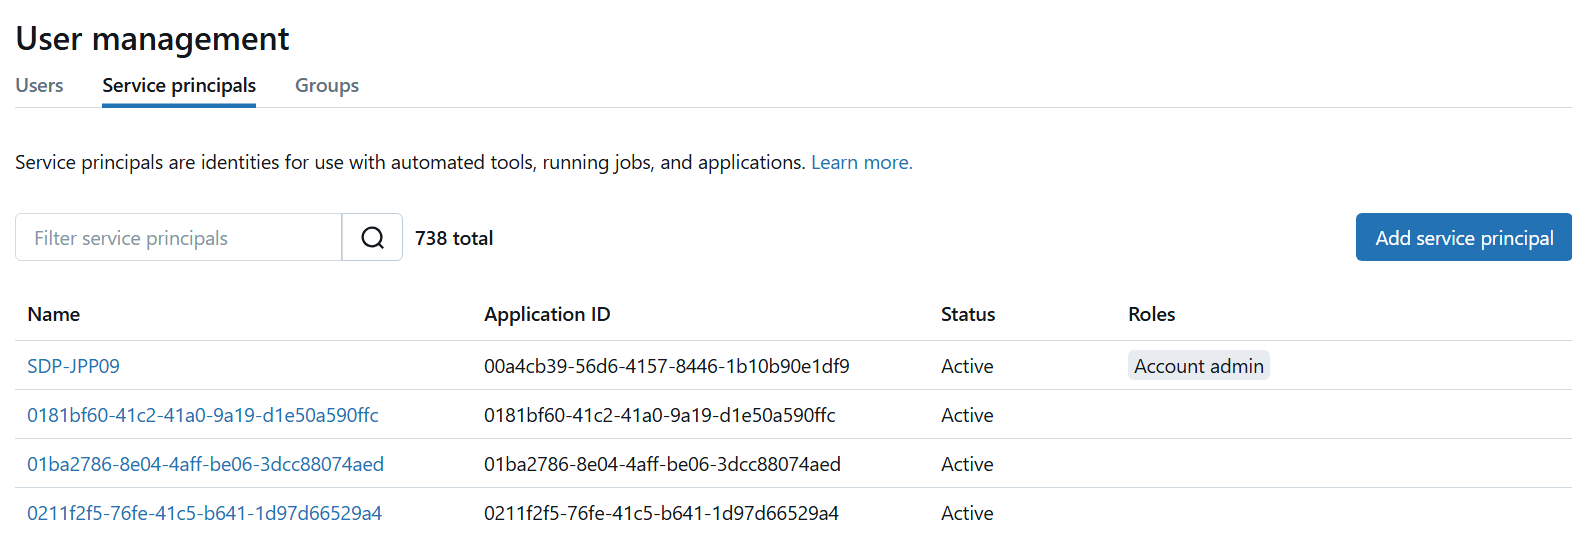
On the roles section, choose Account Admin

Finally, on the Principal Information section, generate a Client Secret and take note of it, as you will not be able to see it later.

With that, you have finished the manual step. The next step is the Supervisor's ARM deployment, in which you will find some parameters that corresponds with the AccountId and Client Secret you have noted.
Step 3. Supervisor's ARM template deployment
Now that we have executed the pre-deployment script, we are ready to deploy the Supervisor:
- Go to Azure Portal and log in using the same user used for the execution of the pre-deployment script.
- Go to "Deploy a custom template" feature. You can use the top search bar in Azure Portal to search for it.
- Now click in "Build your own template in the editor".
-
Replace the content on the template with Supervisor's ARM template (
Supervisor.jsonfile). -
Click "Save" button.
-
Now, the following parameter's form of the Supervisor's ARM template will be displayed:
Parameter name Description Example Required SubscriptionSelects the same subscription in which you executed the pre-deployment script SidraYes Resource GroupSets the same name used in the pre-deploy script SidraYes RegionSelects the region in which you want to deploy Sidra's resources North EuropeYes Deployment PrefixSets a prefix value for the name of the deployed resources. Maximum length of four characters. Beginning with a numeric character is not allowed sdsYes EnvironmentSets the environment name. Maximum length of four characters devYes Supervisor Admin EmailSidra's administrator email [email protected]Yes App Registration Identity Server IdSets the value of "app_registration_identity_server/ApplicationId" from the output of the pre-deployment script 000000-0000-0000-0000-000000000000Yes App Registration Manager IdSets the value of "manager/ApplicationId" from the output of the pre-deployment script 000000-0000-0000-0000-000000000000Yes App Registration Manager Object IdSets the value of "manager/ApplicationId" from the output of the pre-deployment script 000000-0000-0000-0000-000000000000Yes Company NameSets the company name SidraYes Vnet NameName of the existing VNet SidraVNetVnet Resource GroupName of the existing VNet resource group Sidra.VNetDatabase Subnet NameName of the existing database subnet SidraDBContainer App Subnet NameName of the existing container app subnet SidraContainerAppApp Subnet NameName of the existing app subnet SidraAppSubnetStorage Subnet NameName of the existing storage subnet SidraStorageDefault Subnet NameName of the default subnet SidraDefSubnetDefault Dsu Databricks Host Subnet NameName of the default Databricks host subnet SidraHostDefault Dsu Databricks Cluster Subnet NameName of the default Databricks cluster subnet SidraClusterDatabricks Account IdSets the value of "Account Id" used to enable Unity Catalog 000000-0000-0000-0000-000000000000Yes Databricks Admin Client SecretSets the value of "Databricks Admin Client Secret" got when enable Unity Catalog doseXXXXXXXXXXXXXXXXXXXXXXXXXXXXXXXXYes Default DSU TypeType of DSU to deploy. It can be 'Databricks' or 'Fabric'. The default value is Databricks. DatabricksFabric UserFabric user, this value will be mandatory if you selected dsuType = Fabric [email protected]Fabric PasswordFabric password, this value will be mandatory if you selected dsuType = Fabric 000000-0000-0000-0000-000000000000Fabric User Object IdFabric user object id, this value will be mandatory if you selected dsuType = Fabric 000000-0000-0000-0000-000000000000Sidra Admin Object IdAdmin Sidra object id, this value will be mandatory if you selected dsuType = Fabric 000000-0000-0000-0000-000000000000The optional parameters are those related with the integration in the Supervisor deployment of an existing VNet from the customer. By default, a new VNet is created with the Supervisor deployment.
Prerequisites for existing VNet integration
In the resources group where the existing VNet is located, verify the following:
- The existing VNet is in the same location where Sidra is going to be deployed
- The VNet contains the next subnets:
Subnets Service Endpoints Subnet Delegation Network Security Group container_app - Microsoft.KeyVault
- Microsoft.Sql
- Microsoft.StorageMicrosoft.App/environments - database - Microsoft.KeyVault
- Microsoft.Sql
- Microsoft.Storage- - app - Microsoft.KeyVault
- Microsoft.Web
- Microsoft.Storage
- Microsoft.CognitiveServices- - Storage - Microsoft.KeyVault
- Microsoft.Storage- - databricks_cluster - Microsoft.KeyVault
- Microsoft.StorageMicrosoft.Databricks/ workspaces *Example: sds-t009-vnet-ngs-databricks-clusterdatabricks_host - Microsoft.KeyVault
- Microsoft.StorageMicrosoft.Databricks/ workspaces *Example: sds-t009-vnet-ngs-databricks-host*For the subnets associated with Network Security Groups and the creation of these NSG, in the same resource group where is the VNet, create the NSG and name it as:
<name> + <select region>. Later, select the created NSG and associate it to the subnet.-
There must be two NGSs:
ngs-databricks-clusterandngs-databricks-host. -
In the case of deploying an additional DSU, the NSGs and the
databricks_clusteranddatabricks_hostsubnets (Databricks requires only one Databricks for the deployment) must be duplicated. TheStorageandDefaultsubnets necessary to create an additional DSU can be shared between DSUs.
For more information about how to deploy an additional DSU, check this documentation.
For more information about how to deploy a DSU using Fabric, check this documentation.
-
Click "Review + Create" button.
- Azure will start to validate the parameters. If everything is in order, the user will receive a notification stating Validation Passed.
- Click "Create" button.
- The deployment process will start and you will be redirect to the deployment page overview. Here you can check if the deployment is working well. When everything has finished you will see the message "Your deployment is complete.".
- Click to "Go to resource" and you will be redirect to the resource group with all the created resources.
2. Sidra's deployment
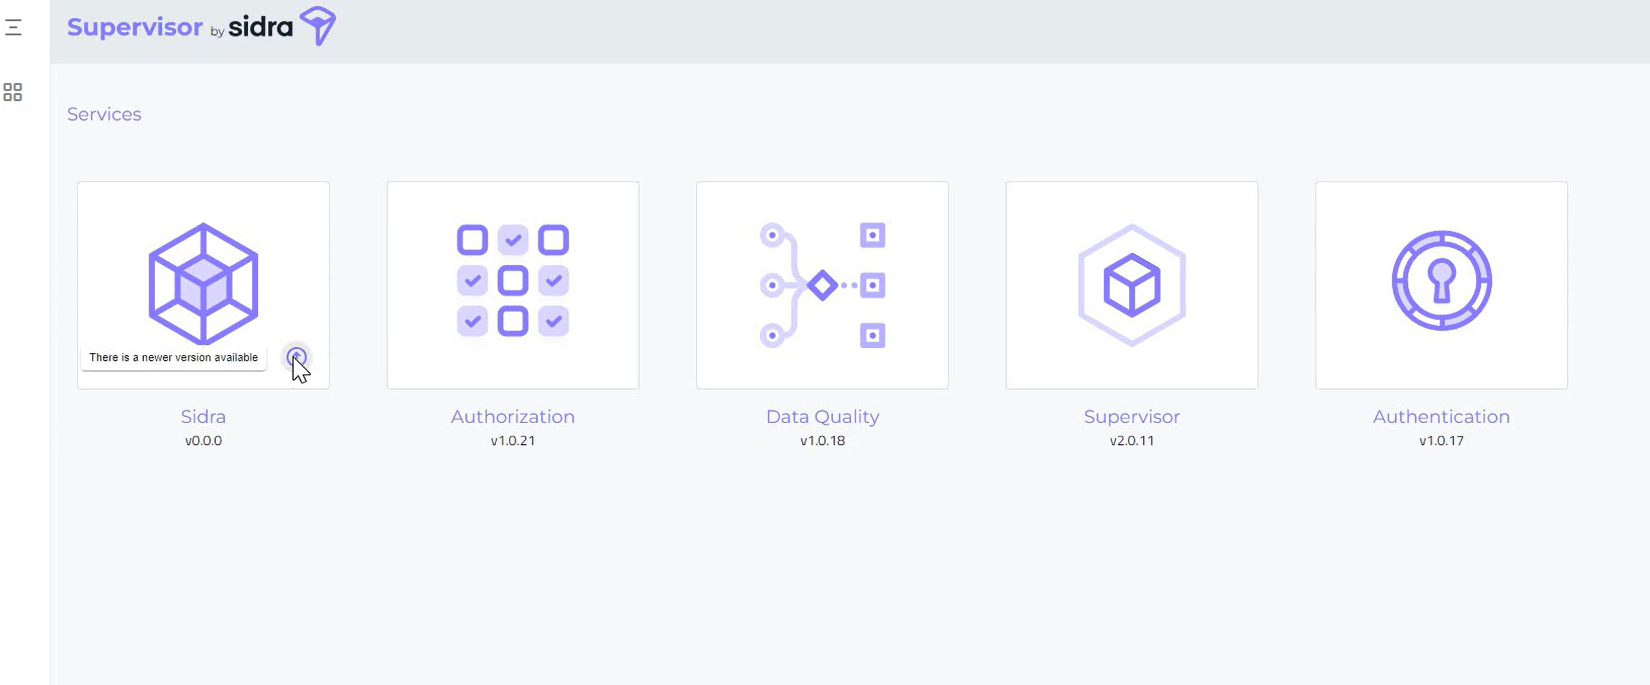
With the steps above, Supervisor's deployment must be completed. The Supervisor will deploy the services that compound Sidra (Sidra, Authorization and Authentication services) and enable the management of updates for each service. After Supervisor deployment, access to Supervisor web interface:
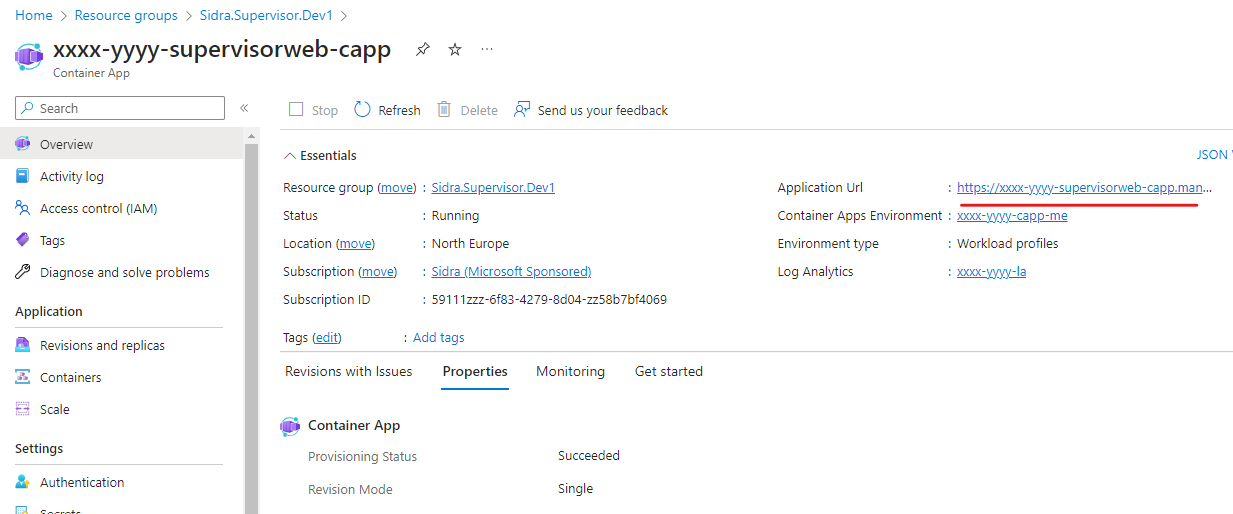
- Go to Supervisor Resource Group.
- Within the Container Application for Supervisor Web, click on the URL.
- Verify credentials and the automatic installation of Sidra will start along with the Authorization and Authentication services.
- Once installed, a screen will display the installed and additional services, enabling the update of each of them.
FAQ
-
I am having an error executing the pre-deployment script. What am I doing wrong?
- If the error message states something like "Forbidden - Authorization_RequestDenied" or "The client <client> with <user-id> does not have authorization or an ABAC condition not fulfilled to perform action", check that the user you are using to execute the script has all the permissions explained in the prerequisites above.
- If the error is something related with one o more of the parameters of the script, check that the values you are using are correct and similar to the examples this document provides.
-
Azure Portal is displaying the message Validation failed after clicking the "Review + Create" button. What is happening?
- Check that you are filling all the parameters of the form and that the values you are using are correct. Compare them with the examples this document provides.
-
In the deployment overview page, I am having the message Deployment has failed or the variant Your deployment failed.
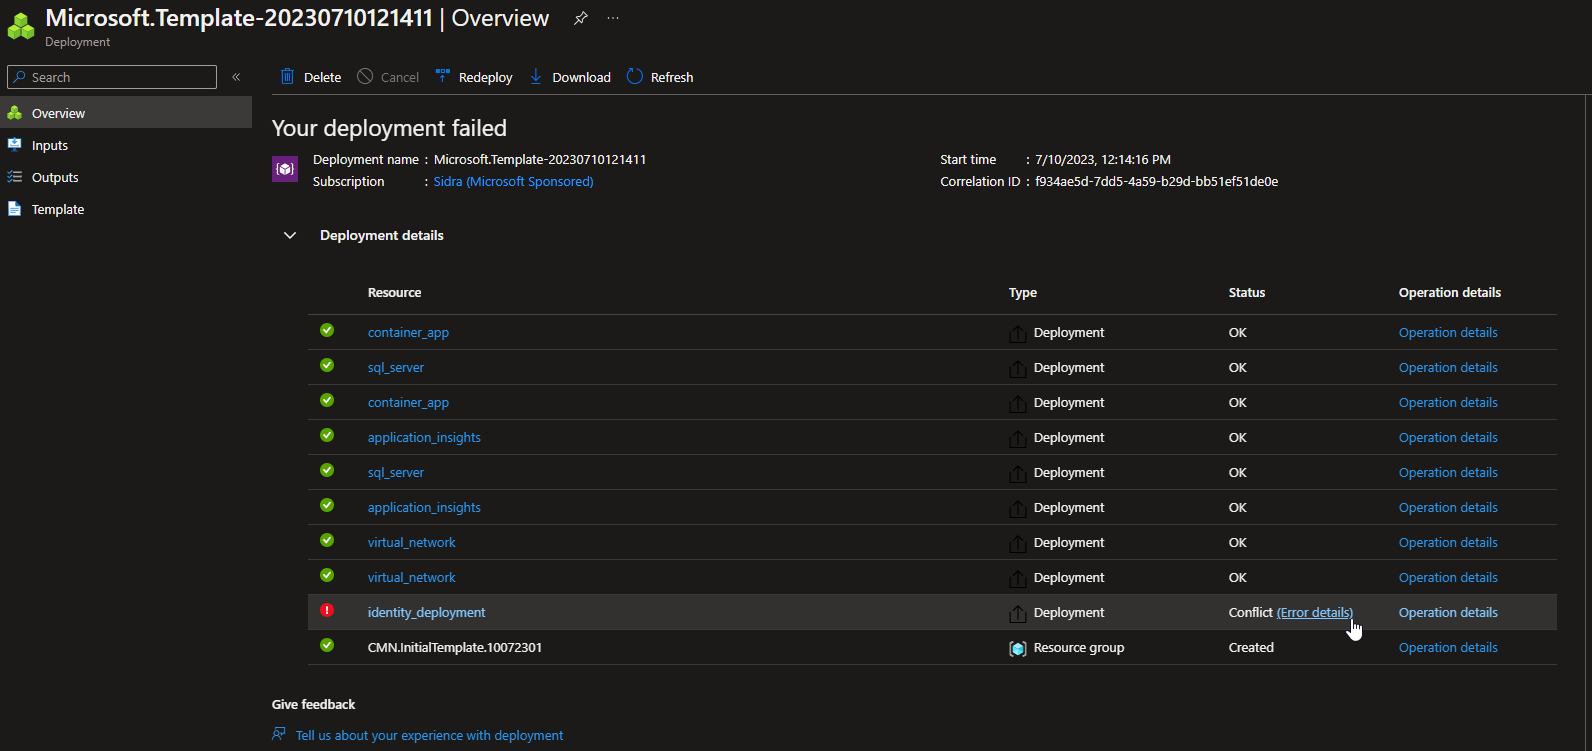
- Check which resource has failed from the resource list and read the error message (it must have a red exclamation with a link to "Error details"). Most of the times it will point what is wrong. Likely, the error will be related with one of the values used in the parameter's form. Check that the values used satisfy the conditions explained and are similar to the examples this document provides.