How to use Unlimited Connector Toolkit
Introduction
The Unlimited Connector Toolkit allows developers to create any kind of Sidra Connector, based on Data Factory and/or Databricks.
Before using it, consider if other, more specific, Connector templates are suitable to the scenario you want to cover, as they could require less custom code.
Prerequisites
This template requires .NET 6.0 SDK or greater installed. The code generated by the template can be edited using Visual Studio 2022 or Visual Studio Code.
How to install
To install the Sidra Unlimited Connector Toolkit, open a command line application and write according to the .NET version the following commands.
Commands for Unlimited Connector Toolkit installation
You should get a message like this in response. The version number may change, and, by default, will be the last stable version available.
Success: Sidra.ConnectorTemplate::4.1.2 installed the following templates:
Template Name                   Short Name       Language  Tags
-----------------------------*  --------------*  -------*  -----
Sidra Connector                 sidra-connector  [C#]      Sidra
Note the Short Name sidra-connector.
How to use
- Before executing the template, create an empty folder.
-
Open a command line and navigate to the folder you have just created. In this example we are using the folder Sidra.Plugin.Connector.SharePointList:
-
Now, execute the template, with something like this:
-
Details of the parameters are included in the next section. For this example, we will use:
-
After a few seconds, you will get a .NET solution with the skeleton of your connector:
Directory of C:\Projects\Sidra.Plugin.Connector.SharePointList 19/07/2023 16:40 <DIR> . 19/07/2023 16:30 <DIR> .. 19/07/2023 16:40 168 .editorconfig 19/07/2023 16:40 4.164 CodeCoverage.runsettings 19/07/2023 16:40 39 global.json 19/07/2023 16:40 <DIR> pipelines 19/07/2023 16:40 <DIR> Sidra 3 File(s) 4.371 bytes 4 Dir(s) 123.942.113.280 bytes free -
Inside the Sidra folder you will find the
.slnfile. You can use Visual Studio to open the solution and add your custom code, but before that, let's review the available parameters for the template execution.
Parameters
-
-n ConnectorName:Name of the Connector. This name will be used as part of the namespaces of the generated files. -
plugin-mode. Depending on the value, some code will be autogenerated or not:DataFactoryPipelineDeployment: The resultant connector will only create Data Factory templates for Sidra, without user interfaceDataFactory: The resultant connector will create Data Factory templates and can include also Databricks notebooks. The connector will have a wizard for parameterization by the user.DataFactoryDBConnector: Same as DataFactory, but intended for extraction from data bases. The connector will include some extra code to manage a secondary pipeline that is used to infer metadata of the Sidra Entities based on the database metadata on the tables.Databricks: The resultant connector will not use Data Factory, only a Databricks job to ingest the data (and create metadata if necessary)
-
plugin_max_sidra_release_version: Version required to execute this connector, in the format YYYY.RNN, for example "2022.R1". -
plugin_min_sidra_release_version: Minimum Sidra Release version supported by the connector in the format YYYY.RNN, for example "2022.R3". -
notebooks_on_install(defaultfalse):-
When
true, code to deploy Databricks notebook is included, otherwise, it isn't. -
It does not apply when
--plugin-modeis equal toDatabricks, as in that case the notebooks are always included.
-
Visual Studio Solution
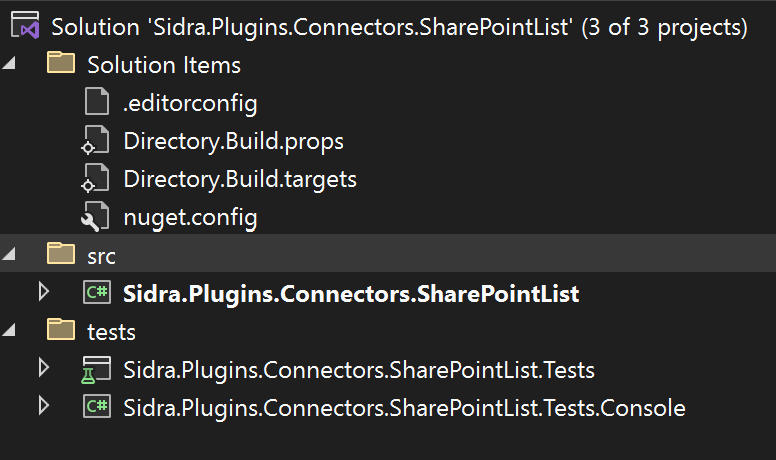
Below the structure of the generated solution is shown:
- "Solution Items" folder contains files to manage the dependencies
- "src" folder contains two projects:
Sidra.Plugins.Connectors.SharePointListis the connector implementation
- "tests" folder contains tests projects
Sidra.Plugins.Connectors.SharePointList.Testscontains unit testsSidra.Plugins.Connectors.SharePointList.Tests.Consoleis a command line application intended to execute the connector locally
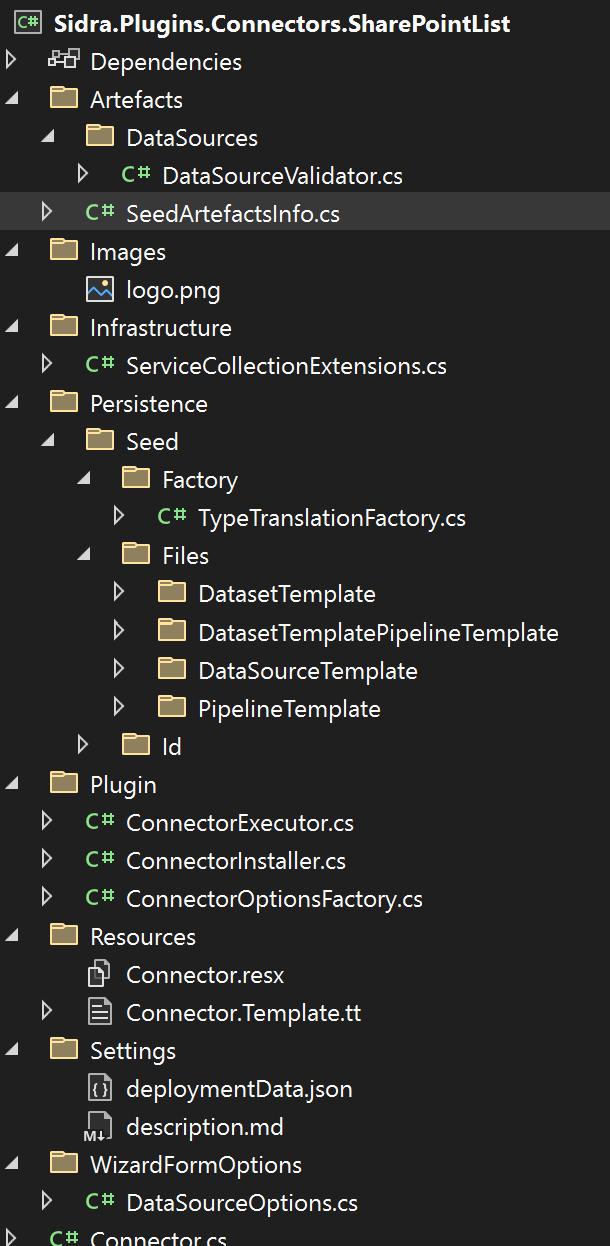
Connector Structure
The structure of the connector will have some small differences depending on the parameterization. The first image below shows a Databricks connector while the following one shows a DataFactory connector. Note that the first one contains a Databricks notebook in Persistence/Seed/Files/ while the second contains a PipelineTemplate instead.
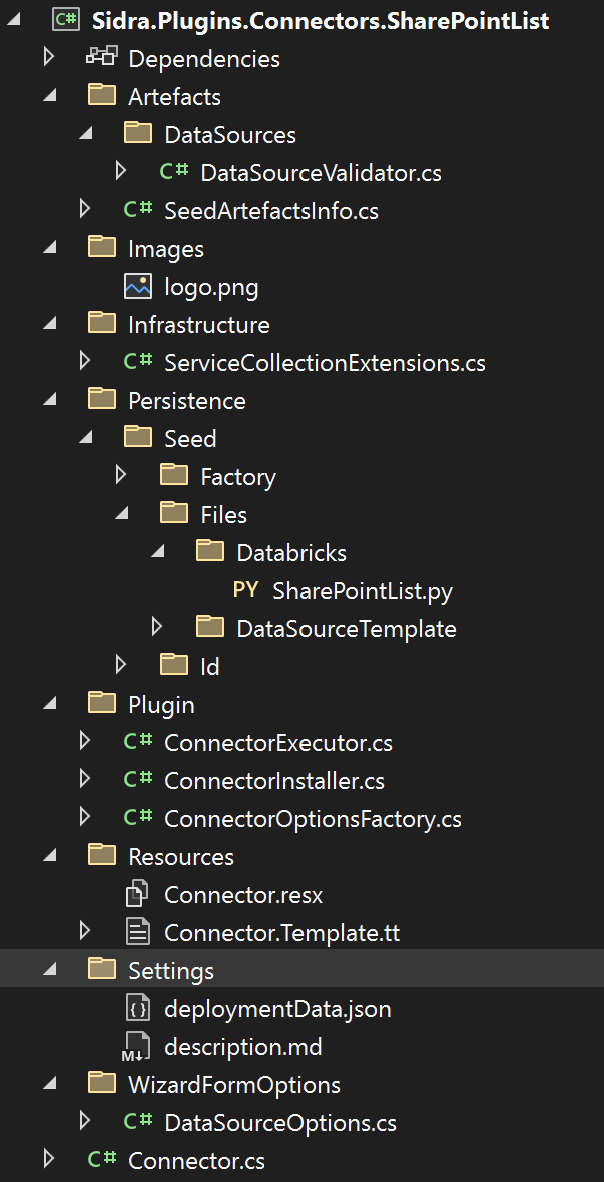
Artefacts/DataSources/DataSourceValidator.cs: contains the DataSource validation. The DataSource defines the origin of the data and, when using DataFactory, can be mapped to a Linked Server.Artefacts/SeedArtefactsInfo.cs: prepopulated list of the pipelines, data sources and dataset templates to be deployed. Each item should be assigned a different GUID.Images/logo.png: the logo of the connector to show in the gallery of Sidra Web.Infrastructure/ServiceCollectionExtensions.cs: Dependency Injection.Persistence/Seed: Databricks Notebooks and templates for Data Factory objects that this connector will create.Plugin/ConnectorExecutor.cs: This is the code that will be executed when the user creates a Data Intake Process using this connector. This code usually creates a Databricks Job or a Data Factory Pipeline. Note that, forDataFactoryPipelineDeploymentconnectors, this code is not executed.Plugin/ConnectorInstaller.cs: This is the code that will be executed when the connector is installed. Typically, it will register some Pipeline Templates in Core´s database or upload some notebook to the Databricks workspace.Plugin/ConnectorOptionsFactory.cs: Here you can configure the wizard pages. Each class included will be mapped to a page.DataSourceOptionsis included by default.Resources: Text resources for the connector.Settings/deploymentData.json: Metadata about the connector.Settings/description.md: A description of the connector to show in the connector wizard.WizardFormOptions/DataSourceOptions.cs: Parameters the user must introduce to configure the Data Source.Connector.cs: main class.
Next steps
The code generated by the template is the skeleton of the connector. Much of the code is already there, but, to have a complete implementation, some code has to be added:
- Parameters definition for the wizard.
- Validation code, to validate the parameters introduced by the user using the wizard and/or the Data Source parameters.
- Data Source template definition.
- Custom code on your Databricks notebook. The autogenerated notebook will contain some comments to help you add that code.
- Data Factory templates definition.
For this example, Data Factory templates definition are not necessary.
Wizard Parameters
Each section of the Wizard is represented by a class that will contain the parameters to fill in that section. A couple of sections are added by default, but you can have as many as you need by adding them to the list in GetConnectorOptions.
    public ICollection<Type> GetConnectorOptions()
    {
        // Add here the options that you want to be available in the wizard form
        return new List<Type> {
            typeof(DataSourceOptions),
            typeof(MetadataExtractorOptions)
        };
    }
Data source parametrization
To add parameters to a section, you just need to add public properties to the class representing that section and decorate them with some attributes. For this example, let's add to the DataSourceOptions the necessary parameters to connect to SharePoint and read a SharePointList.
    public class DataSourceOptions : BaseDatabricksDataSourceOptions
    {
        [JsonProperty("clientId")]
        [Wizard(Order = 32, IsRequired = true, Editable = true, Indent = 3)]
        public string ClientId { get; set; }

        [JsonProperty("clientSecret")]
        [Wizard(Order = 35, IsRequired = true, Editable = true, Indent = 3, InputType = WizardElementInputType.Password)]
        public string ClientSecret { get; set; }

        [JsonProperty("tenantId")]
        [Wizard(Order = 33, IsRequired = true, Editable = true, Indent = 3)]
        public string TenantId { get; set; }

        [JsonProperty("siteName")]
        [Wizard(Order = 34, IsRequired = true, Editable = true, Indent = 3)]
        public string SiteName { get; set; }

        [JsonProperty("listName")]
        [Wizard(Order = 35, IsRequired = true, Editable = true, Indent = 3)]
        public string ListName { get; set; }

        [JsonProperty("fieldList")]
        [Wizard(Order = 36, IsRequired = false, Editable = true, Indent = 3, Description = "Comma-separated field names")]
        public string FieldList { get; set; }

        [JsonProperty("sidraEntityName")]
        [Wizard(Order = 37, IsRequired = true, Editable = true, Indent = 3, Description = "Destination Entity Name")]
        public string EntityName { get; set; }
    }
-
The Wizard attribute is used to configure the way the field will be shown on the wizard.
-
Note that we are using a password field for the client secret, and adding some description to the fields that needs it.
-
fieldListis the only non-required field, because, if empty, we will load the entire list.
Now, we just need to add some friendly titles for these properties that will be shown in the form instead of the property names defined in this class. To do this, we need:
-
To open the
Resources/Connector.resxfile and add one entry for each property of the class using this format: -
Replace {NameOfTheSection} and {NameOfTheProperty} with the respective values.
Example:
| Name | Value |
|---|---|
| WizardFormElement_DataSourceOptions_ClientId_Title | Client Identifier |
| WizardFormElement_DataSourceOptions_ClientSecret_Title | Client Secret |
Validation
Now that we have our wizard's parameters configured, we can add some validation for the user input on those parameters.
To do so:
-
We must edit
the DataSourceValidator:public async Task Validate(PluginValidationResult validationResult, Dictionary<string, object> parameters, Provider provider) { // GetOptions accepts a custom json converter if needed var dataSourceOptions = parameters.GetOptions<DataSourceOptions>(); throw new NotImplementedException(); }Where:
- Note the dictionary of parameters it receives is deserialized back to a
DataSourceOptionsobject for your convenience.
- Note the dictionary of parameters it receives is deserialized back to a
-
Add the following code to validate the connection to SharePoint:
    public async Task Validate(PluginValidationResult validationResult, Dictionary<string, object> parameters, Provider provider)
    {
        // GetOptions accepts a custom json converter if needed
        var dataSourceOptions = parameters.GetOptions<DataSourceOptions>();

        var credential = new ClientSecretCredential(dataSourceOptions.TenantId, dataSourceOptions.ClientId, dataSourceOptions.ClientSecret);
        GraphServiceClient graphClient = new GraphServiceClient(
            credential,
            new List<string>() { "https://graph.microsoft.com/.default" });

        try
        {
            var site = (await graphClient.Sites.GetAsync()).Value.FirstOrDefault(s => s.Name == dataSourceOptions.SiteName);
            if (site == null)
            {
                validationResult.ValidationErrors.Add($"SharePoint Site {dataSourceOptions.SiteName} does not exists");
            }

            var list = site.Lists.FirstOrDefault(l => l.Name == dataSourceOptions.ListName);
            if (list == null)
            {
                validationResult.ValidationErrors.Add($"SharePoint List {dataSourceOptions.ListName} does not exists in Site {dataSourceOptions.SiteName}");
            }
        }
        catch (Exception) {
            validationResult.ValidationErrors.Add("Could not connect to SharePoint");
        }
    }
For this code to build, you will need to add some references, that you can easily resolve from Visual Studio.
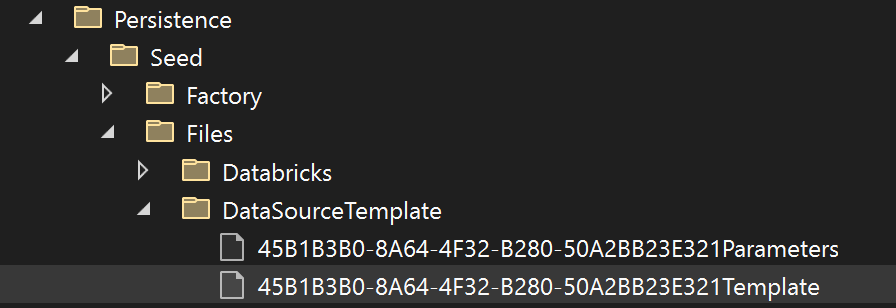
DataSource template definition
Now that the Data Source connection info is validated, we need to store it in Sidra so the artifacts created by the connector (Databricks notebooks or Data Factory pipelines) can use it each time they are executed.
For that, we must create a DataSource Template. The template will be used to create the effective DataSource when the wizard finishes, so we have the same template for each DataSource of any Data Intake Processes created using this connector.
There are two existing files in the directory of the image below, to hold the template and the parameters it will receive. Both are typically in Json format.
For our example, we need a Client Secret to connect to the SharePoint API, so, the DataSourceTemplate will look as follow:
{
  "name": "<<name>>",
  "type": "AzureKeyVaultSecret",
  "properties": {
    "typeProperties": {
      "clientsecret": {
        "type": "AzureKeyVaultSecret",
        "secretName": "<<name>>clientsecret"
      }
    }
  }
}
- The texts between <<>> are placeholders that will be replaced when a DataSource is created using this template.
Now, the parameters required to create a DataSource are as follows:
The name parameter is required because it is used for the replacement of <<name>>. The clientsecret parameter is marked as isSecret, which means it will be stored in the Key Vault. The name of the key will be <<name>>clientsecret, as specified in the template, in the line:
DataSource creation
The DataSource is automatically created using the provided DataSource template and the parameters provided by the method GetDataSourceRequest on the DataSourceParametersFactory class.
name is already include, so let's add clientsecret so the method ends as follows:
    public DataSourceRequest GetDataSourceRequest(Provider provider, Dictionary<string, object> parameters)
    {
        var dataSourceOptions = (DataSourceOptions)GetOptions(parameters);

        var dataSourceParameters = new List<DataSourceParameterRequest> {
            new DataSourceParameterRequest{ Name="name", Value=Constants.DATA_SOURCE_NAME  },
            new DataSourceParameterRequest{ Name="clientsecret", Value = dataSourceOptions.ClientSecret  }
        };

        return new DataSourceRequest { DataSourceType = Constants.DATA_SOURCE_TYPE, IdProvider = provider.Id, Parameters = dataSourceParameters };
    }
- Note that
clientsecretis populated with theClientSecretparameter provided by the user.
DataSource template feed
The DataSource template will be feed to Sidra if it is included in the following function:
    public static List<SeedArtefactInfoDto> DataSourceTemplatesInfo => new()
    {
        new SeedArtefactInfoDto(DataSourceTemplates.DATA_SOURCE_TEMPLATE_ID, "SharePointList", "DataSource template for SharePointList connector")
        //Add more if needed
    };
The default one we are using is already included, so there is nothing to do unless you want to change the name or description.
Notebook
The default notebook already contains code create the metadata, the table in the Data Storage Unit and ingested data in it from a DataFrame.
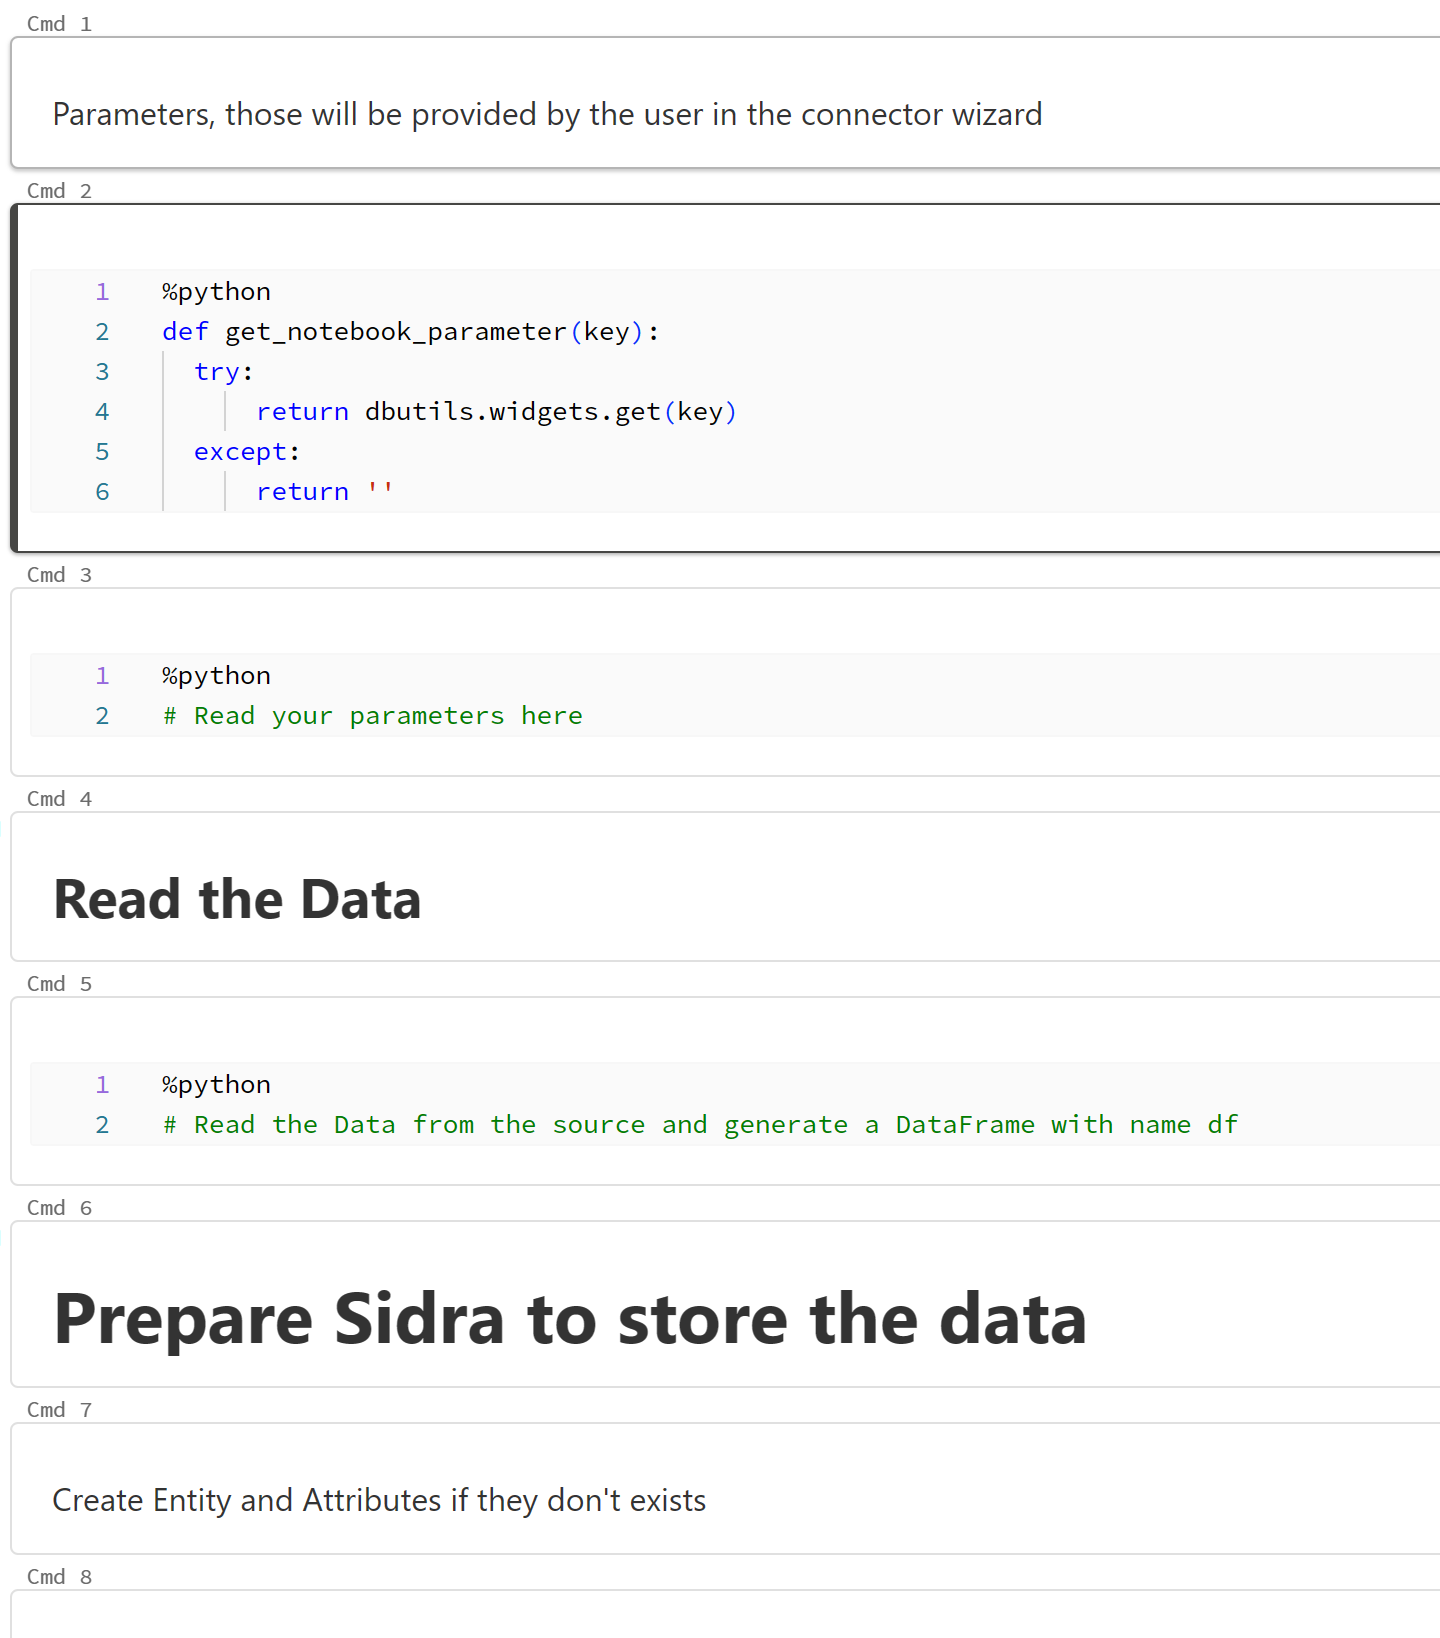
We still need to fill the gaps, which are:
- Define the execution parameters.
- Obtain the data from the source.
- Create a DataFrame with the obtained data.
Then:
-
In the first Python empty cell, put the following code to add some parameters to the notebook:
client_id = get_notebook_parameter("ClientId") client_secret_key = get_notebook_parameter("ClientSecretKey") tenant_id = get_notebook_parameter("TenantId") site_name = get_notebook_parameter("SiteName") list_name = get_notebook_parameter("ListName") fields = get_notebook_parameter("FieldList") provider_item_id = get_notebook_parameter("ProviderItemId") entity_name = get_notebook_parameter("EntityName") data_intake_process_id = get_notebook_parameter("data_intake_process_id") -
Now, in the next Python empty cell, add the following code to read a SharePoint list. Feel free to split it in several cells if you prefer.
import msal
import json
import logging
import requests

authority = f"https://login.microsoftonline.com/{tenant_id}"

app = msal.ConfidentialClientApplication(
    client_id=client_id,
    client_credential=client_secret,
    authority=authority)

scopes = ["https://graph.microsoft.com/.default"]

result = app.acquire_token_for_client(scopes=scopes)

if "access_token" in result:
    token = result["access_token"]
else:
    raise("Could not create token to connect to Sharepoint")

if "access_token" in result:
    # Find site
    endpoint = f'https://graph.microsoft.com/v1.0/sites/?search={site_name}'
    sites = requests.get(endpoint,
                        headers={'Authorization': 'Bearer ' + token},).json()["value"]
    #sites = [s for s in site if s.name == site_name]
    if (not(sites)):
        raise (f'Site {site_name} not found')
    site_id = sites[0]["id"]

    # Find list
    endpoint = f'https://graph.microsoft.com/v1.0/sites/{site_id}/lists/'
    lists = [l for l in requests.get(endpoint,
                        headers={'Authorization': 'Bearer ' + token},).json()["value"]
            if l["name"] == list_name]

    if (not(lists)):
        raise (f'List {list_name} not found in {site_name}')
    list_id = lists[0]["id"]

    # Load all list items
    endpoint = f'https://graph.microsoft.com/v1.0/sites/{site_id}/lists/{list_id}/items?expand=fields(select={fields})'
    graph_data = requests.get(endpoint,
                            headers={'Authorization': 'Bearer ' + token},).json()

df = spark.createDataFrame([item["fields"] for item in graph_data["value"]]).drop("@odata.etag")
Databricks Job
Finally, we need to create a Job that will execute the Notebook.
We must modify the FillUserParameters method so it passes all the necessary parameters to the Notebook.
    protected override void FillUserParameters(IList<JobParameter> jobParameters)
    {
        var dataSourceOptions = Parameters.GetOptions<DataSourceOptions>();

        // Add parameters to be passed to the job.
        // You can use the parameters from the DataSourceOptions or from any other section of the wizard parameterization.
        jobParameters.Add(new JobParameter("TenantId", dataSourceOptions.TenantId));
        jobParameters.Add(new JobParameter("ClientId", dataSourceOptions.ClientId));
        jobParameters.Add(new JobParameter("ClientSecretKey", GetDataSourceSecretKey(Constants.DATA_SOURCE_NAME, dataSourceOptions.ClientSecret)));
        jobParameters.Add(new JobParameter("SiteName", dataSourceOptions.SiteName));
        jobParameters.Add(new JobParameter("ListName", dataSourceOptions.ListName));
        jobParameters.Add(new JobParameter("EntityName", dataSourceOptions.EntityName));
        jobParameters.Add(new JobParameter("FieldList", dataSourceOptions.FieldList));


        base.FillUserParameters(jobParameters);
    }
-
data_intake_process_id parameteris included bybase.FillUserParameters, so you don't need to specify it. -
Note the use of the method
GetDataSourceSecretKeyto apply the naming convention applied to all secrets in DataSources.
Scheduling
Job scheduling is automatically supported, you don't need to do anything. Users will get a page on the wizard to configure when the job must run.
Make it friendly
Replace the logo.png file in the Images folder with your own logo. It will be displayed in the wizard.
Add a description to the description.md file in the Settings folder. It will also be displayed in the wizard.