How to create an API Connector Template
This tutorial describes a detailed step by step guide to create a Connector to import data from an external web API.
The external data source is the public API Fixer.
To authenticate against the API it is necessary to obtain a key. Keep the API key generated for further steps.
0. Prerequisites
- .NET SDK (6.0 or higher)
- IDE that support C# and Python languages (v.g. Visual Studio or Visual Studio Code)
- Python 3 or higher
1. Install the template
Sidra releases a dotnet template to speed up the development process for connectors.
This template provides the structure of the dotnet solution, references to necessary libraries, and helpers to create and register a connector.
The languages used are C# and Python.
The template is available as a nuget package in this nuget source.
Steps
For creating a new connector solution, you need to install the dotnet project template in the machine where the connector is going to be implemented. To do that, open a PowerShell console or a Command Prompt (CMD) and follow the next steps:
-
Execute this command to install the template:
-
To check that the new template has been installed in your environment and it is available, execute the following command:
3. Check that the results show a line like this:
2. Create the solution
Once the template is installed and available in the computer, to create a .NET solution from it is possible. To do so, execute:
dotnet new sidra-api-connector -o C:\Code\Fixer --auth-type APIKey --plugin_min_sidra_release_version 2023.R3
Where:
-ois the destination path where the solution will be created. The name of the solution will be the same as the last folder in the path.-
--auth-typeis one of the different authentication options available:- APIKey
- BasicAuth
- OAuth
- NoAuth
For this tutorial, APIKey is selected because is the authentication mode for the fixer API.
-
plugin_min_sidra_release_versionis the minimum Sidra version for which this connector will be compatible.In this tutorial, the 2.0 (2023.R3) version is the required one.
After the command execution, a new folder in the destination path is created with the solution elements on it.
Solution structure
Open the solution file (*.sln) on an IDE of your choose to access to the source code.
Developing the connector
Inside the solution, go to the Persistence/Seed/Files/Databricks folder in the Sidra.Plugins.Connectors.Fixer project.
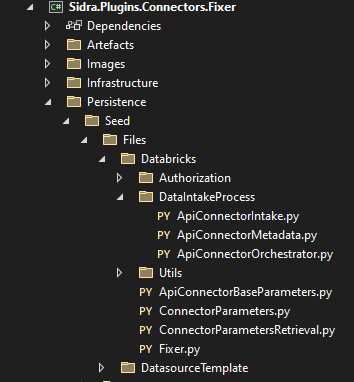
These python notebooks will be deployed in a Databricks instance during the creation of a Data Intake Process using this connector, creating a job with the schedule defined in the creation. They contain all the custom logic necessary for the Connector to get the data from the external API and start a Data Intake Process.
1. Notebook
Fixer.py is the main notebook, the one that the job will execute and the responsible for getting the necessary parameters and execute the Data Intake Process.
The name of this notebook could change depending on the name of the solution specified during the solution creation.
The solution created from the template implements, as a sample, the necessary code to call the fixer API and process the data for each Entity defined. Take a look to the notebook to familiarize with the different steps implemented to do so.
In summary, the Fixer.py notebook will retrieve the necessary parameters to create an authenticated service to call the external API, obtain the parameters for the execution of the Data Intake Process, retrieve the data from the API, process them, and then call the execute method in the APIConnectorOrchestrator class.
This method will get the json data returned by the API and post-processed in a custom method, create the metadata (Entity, Attributes and Data Intake Process) if they are not defined in the Sidra environment, and perform the data ingestion.
It is possible to use the sample code as it is, but, for the sake of the tutorial to be more complete, let's use that as a base to do some customization.
Fixer API has other endpoints (check the documentation) available. For this tutorial, the Historical endpoint is used, retrieving information about the rates for an specific day.
With a DataIntakeProcess scheduled to be executed daily, and then customizing the notebook to perform the call to the endpoint using the day before, it is possible to have the historic data of a exchange rate for a currency.
This endpoint also receives a parameter to specify the base currency from which the data is calculated. With that parameters it could be possible to save different entities for different base currencies.
Be aware that the free version of the fixer API only support EUR as base currency.
2. Calling the new endpoint
Now, adapt the existing code to be able to call to the new endpoint:
-
First, remove the endpoint_path assignation:
-
Create variables to define the last day with the YYYY-MM-DD format to build the endpoint url.
-
For this operations on datetime to work it is necessary to import the references used in the import section of the notebook:
-
Retrieve the base currency from the parameters:
-
Modify the full_url assignation to build the full API endpoint:
-
The loop will look like this:
for source_option in endpoint_source_options:

    connector_parameters.entity_name = source_option.entityName
    base_currency = source_option.baseCurrency
    one_day_before = datetime.now(timezone.utc) - timedelta(days=1)
    one_day_before = one_day_before.strftime("%Y-%m-%d")
    # Call the historical endpoint for the change rate of the last day
    full_url = f'{connector_parameters.base_url}/{one_day_before}?base={base_currency}'
    expand_collections = source_option.expandCollections
    # Call endpoint to get the response in json format
    response = authenticated_service.request(full_url)

    if response.status_code != 200:
        logger.error("Error calling endpoint: " + full_url + " with status code: " + response.status_code)
        continue #Continue with the next entity

    api_response_json = response.json()
    ### Transform the json result if needed
    api_response_json = process_response_json(api_response_json)
    api_response_json_string = json.dumps(api_response_json)
    # Call base method to execute the Ingestion process
    data_intake_process = ApiConnectorOrchestrator(connector_parameters)
    data_intake_process.execute(api_response_json_string, expand_collections)
Looking at the endpoint documentation, the endpoint returns two values - success and historical - that do not add relevant information, so they can be removed.
-
Change the process_response_json method to remove these two values:
3. Metadata extractor definition
At this point of the customization, the parameter endpoint_path has been removed and base_currency has been created. This should be reflected in the parameter definition of the Connector. These parameters are defined in the file MetadataExtractorOptions located in the WizardFormOptionsfolder.
-
Change the class
EndpointSourceOptionsto look like this:The second propertypublic class EndpointSourceOptions { [JsonProperty("entityName")] [Wizard(IsRequired = true, Editable = true, IsMatrixCell = true, CellType = WizardCellType.Text, ValidationType = WizardValidatorType.Regex, ValidationRegex = @"^[a-zA-Z0-9]{5,30}$", ValidationText = "Please enter a name between 5 and 30 characters without special characters")] public string EntityName { get; set; } [JsonProperty("baseCurrency")] [Wizard(IsRequired = false, Editable = true, IsMatrixCell = true, CellType = WizardCellType.Text)] public string BaseCurrency { get; set; } [JsonProperty("expandCollections")] [Wizard(IsRequired = true, Editable = true, IsMatrixCell = true, CellType = WizardCellType.Boolean, DefaultValue = "false")] public bool ExpandCollections { get; set; } }baseCurrencyhas been added so it could be defined during the Data Intake Process creation. -
For changing the title on the Wizard form displayed during the Data Intake Process creation, go to
to and set the value toResources\Connector.resxfile to modify the existing line with the fieldNamefrom the value.BaseCurrency. -
Save and generate the template by right click on the
Connector.Template.ttfile and select the option "Run custom tool".
4. Databricks Job
The parameters that will be passed to the job, and then to the notebook, are defined in the method FillUserParameters in the ConnectorExecutor class. This method is supporting the necessary parameters to perform the authentication to the external API depending on the authentication method selected during the creation. If you would need to add more parameters, this is the right place to do it.
Below, the common parameters for all types of authentication are shown as example of how to define a job parameter.
    protected override void FillUserParameters(IList<JobParameter> jobParameters)
    {
       base.FillUserParameters(jobParameters);

            var dataSourceOptions = Parameters.GetOptions<DataSourceOptions>();
            jobParameters.Add(new JobParameter("base_url", dataSourceOptions.BaseUrl));
            jobParameters.Add(new JobParameter("provider_item_id", Provider.ItemId.ToString()));
    }
In the example, a job parameter is defined by its name and the value. That value can come from different sources, in this case, the value is coming from the DataSourceOptions, mapped from the parameters defined during the creation of the DIP. data_intake_process_id parameter is included by base.FillUserParameters, so you don't need to specify it.
5. Scheduling
Job scheduling is automatically supported, you don't need to do anything. Users will get a page on the wizard to configure when the job must run.
6. Make it friendly
Replace the logo.png file in the Images folder with your own logo. Add a description to the description.md file in the Settings folder. It will be displayed in the wizard along with the logo.